de-Esser
How to Use Your De-Esser Right

The harsh ‘ess’ sounds orators or singers can produce during a powerful delivery close to a microphone are well-known. Almost every vocal recording contains ‘ess’ noises, whether from a strong vocal delivery, bad recording, speech impediments, or simply many ‘ess’ words spoken together. Wind instruments and other musical instruments may also make piercing ‘s’ sounds.
The de-esser is a tool to attenuate or remove these ‘ess’ noises, by reducing the level of high frequencies near the ‘ ess’ frequency. It does this by narrowing the bandwidth of the de-essing filter so that only those frequencies around the target ‘ ess’ are reduced in volume, leaving the rest of the spectrum untouched.
Do I Need a De-Esser?
Many De-Essers come with a range of controls that can seem daunting to new users. This blog post will walk you through the basics and show you how to use your De-Esser right! We’ll start with some tips for recording vocals, then we’ll talk about applying this technique in the mix. Finally, we’ll cover it on stage. Today let’s talk about how are using your De Esser right.
De-Essing is often a necessary step when mixing audio, but it’s rarely simple—especially if you’re just getting started. Many elements influence De-Essing’s challenging aspect, including the way split-band processors can alter the character of a sound and how human voices can fluctuate between sibilance and sibilancy. There are De-Essers in most DAWs, and there’s a never-ending list of aftermarket plugins.
What Is De-Essing?
De-Essing is the process of reducing or eliminating the sibilant sounds from a vox track. Sibilant sounds are those that are produced by consonants such as “S”, “T”, and “F”. They can often make a vocal track sounds harsh or distorted. De-Essing helps to smooth out the sound of a vox track, making it sound more natural.
There are two main types: analog and digital. Analog De-Essers use electronic filters to remove the sibilant sounds, while digital De-Essers use software to achieve the same effect. Both types of De-Essers have their pros and cons, and it’s up you to decide which one will work best for your situation.
What Is Sibilance?
Sibilance is the harshness or distortion that can be heard in a vocal track when certain consonants are pronounced. Sibilant sounds are produced by consonants such as “S”, “T”, and “F”. They can often make a vocal track sound harsh or distorted.
Smooth out A Vox Track
De-Essing helps to smooth out the sound of a vox track, making it sound more natural. Sibilance itself isn’t terrible; it would sound odd if we removed it entirely. However, too much sibilance can make a vocal track difficult to listen to.
The sibilance in these examples occurs at the higher end of the frequency range. When listening to music on earbuds and small speakers, sibilance is more unpleasant. AirPods and normal smartphones and laptop speakers are used by hundreds of millions of people to listen to music. Because these frequencies are so high and powerful, they can easily take over a mix if not reduced appropriately.

De-Essing Techniques for Vocal Tracks
There are many De-Essing techniques that you can use to get rid of sibilant sounds in your vocal tracks. However, some De-Essing tools require a longer attack time (and therefore less) and others work better with a shorter attack time (and more). Experiment with different De-Essing techniques and find the one that works best for your track. To begin, pay attention to the singer’s voice and the vocal recording for quality.
When De-Essing during the recording phase, some plugin can be used as an insert effect on a vocal soundtrack. This means that you would deactivate the De-Esser’s output and route it directly into its input (if you’re using an analog version). You would then deactivate the De-Esser’s input and route it to its output (if you’re using a digital plugin). If your De-Esser has a threshold control, make sure that it is turned down all of the ways. This prevents any De-Essing From happening when recording.
Using Your De-Esser Right
Once you’ve set up your De-Esser this way, you can begin recording. You will need to monitor the De-Essed signal while recording in order to make any necessary adjustments. Make sure that no De-Essing is happening during your recordings by checking for red lights on your De-Esser or software plugin. If any are lit up, then there’s too much De-Essing happening and you’ll need to adjust the threshold control.
A Few De-Essing Tips to Get You Started
- Use a high passing filter to remove any low-end noise from the vox track before De-Essing. This will help to prevent any De-Essing artifacts from being introduced into the high-frequency range.
- Use a De-Esser with multiple bands to increase precision. The more bands that your De-Esser has, the better it will be able to detect specific frequencies for De-Essing purposes.
- When De-Essing during the mix, start by slowly increasing the De-Esser threshold control until you start hearing De-Essing on your vocal track. If there are any De-Essing artifacts (distortion, sss sounds, etc.), then back off of the De-Esser’s threshold control to minimize these effects.
- Try using sidechain compression on your vocal track by routing a De-Essed version of the same track back into an audio channel on which you are compressing your original vocal track with a fast attack time. This technique has a natural sound and is especially useful during the mixing stage.
De-Essers and Dynamic EQ
The disadvantage of hand De-Essing is that it takes a long time. Adjusting manually by hand with a dedicated De-Esser plug-in or a dynamic EQ is more common. These tools will both analyze a specific frequency band to detect sibilance, most commonly in the sibilant region of the spectrum. When this sibilant audio content reaches a certain volume, the De-Esser or dynamic EQ can automatically lower the sibilance.
This is obviously considerably quicker than scanning a waveform for sibilant sounds and lowering clip gain, and it’s usually clear enough to suffice. Just be careful that you don’t let these automatic solutions run unattended, as you could get undesirable results.
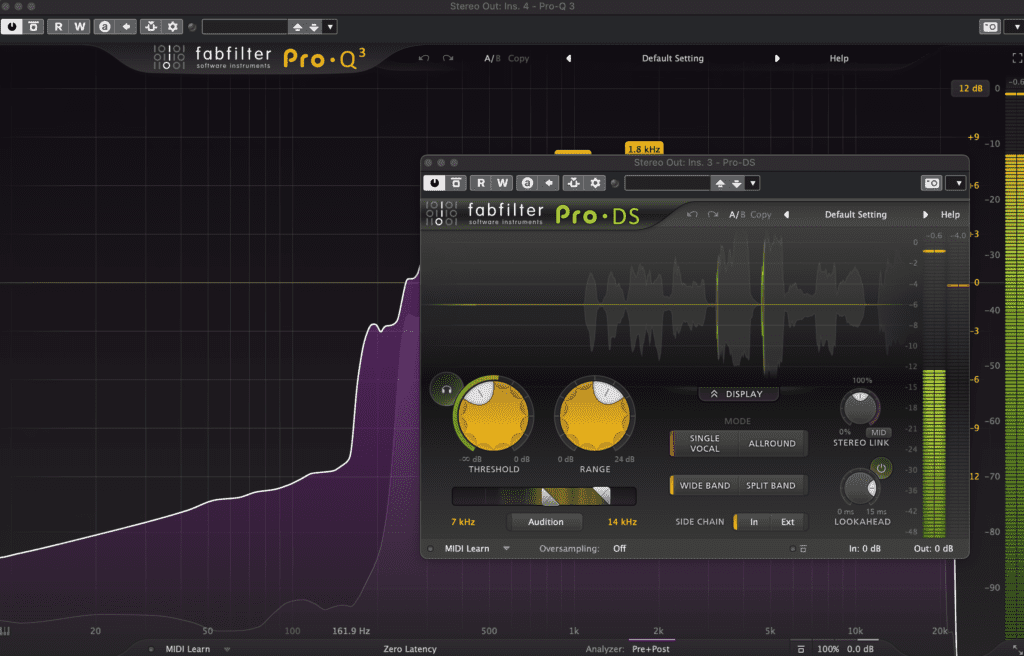
De-Essing in the Mix
When you’re ready to de-ess in your mix, start by inserting a de-essing plug into the vocal track that you want to de-ess. Make sure to insert it directly on the channel strip before any other effects are applied (EQs, compressors etc.).
Next, set up your de-essing parameters according to how much sibilance you want to de-ess. For the de-essing plug in that you are using, this may include setting a threshold control and varying the frequencies of specific band controls (if it has them). Once everything is set up properly, turn off all other effects on your vocal track so that only de-essing is happening.
Then begin de-essing by slowly increasing the de-esser threshold control until you start hearing de-essing on your vocal track. If there are any de-essing artifacts (distortion, sss sounds etc.), then back off of the de-esser’s threshold control to minimize these effects. Continue this process until you find a balance between de-essing and de-essing artifacts that you can live with.
De-Essing in Mastering
When de-essing during the mastering phase, it’s best to use a digital de-esser as an insert effect on your mix bus. This will allow you to fine tune the de-essing process without affecting the rest of your track. You can de-ess either during the mixing or mastering stage.
The de-essing process is basically the same when de-essing in mastering as it is for de-essing in the mix: set up your de-esser according to how much sibilance you want to be removed and then start gradually increasing its threshold control until artifacts begin appearing. If they do, back off of the de-esser’s threshold control until they’re gone.
It’s also important to make sure that you’re not de-essing too much during the mastering stage. Over-de-essing can cause your track to sound harsh and brittle, so be careful not to go too far with it.
When de-essing in the mix, it’s best to use a digital de-esser as an insert effect. This will allow you to fine tune the de-essing process without affecting the rest of your mix. You can de-ess either during the mixing or mastering stage.
De-Essing Techniques for Vocal Tracks
There are many de-essing techniques that you can use to get rid of sibilant sounds in your vocal tracks. However, some de-essing tools require a longer attack time (and therefore less de-essing) and others work better with a shorter attack time (and more de-essing). Experiment with different de-essing techniques and find the one that works best for your track.

Do You Know How To Use a De-Esser?
Many de-essers come with a range of controls that can seem daunting to new users. This blog post will walk you through the basics and show you how to use your De-Esser right! We’ll start with some de-essing tips for recording vocals, then we’ll talk about de-essing in the mix. Finally, we’ll cover De-Essing on stage.
When to Use a De-Esser
- Use a De-Esser as an insert effect on your mix bus when De-Essing during the mastering phase.
- Set up your De-Esser according to how much sibilance you want to remove and then start gradually increasing its threshold control until artifacts begin appearing.
- Use a De-Esser for other instruments, such as cymbals and guitar tracks. De-Essing can also be used on other instruments to get rid of unwanted sounds. For example, you can de-ess cymbals to get rid of the hiss and crackle sounds. You can also de-ess guitar tracks to get rid of any excessive string noise. Experiment with different De-Essing techniques to find the one that works best for your track.
- When De-Essing in the mix, it’s best to use a digital De-Esser as an insert effect. You can De-Ess either during the mixing or mastering stage.
- Depending on your ears and doing manual De-Essing instead of using automatic de-essers tools, learn your favorite one out of the many the de-essing plugins.
- Reduce the threshold until a gain reduction is noticed. Now pay attention as you change the threshold. Locate the threshold at which sibliance is maintainable before vocal deterioration sets in.
When Not to Use a De-Esser
- De-Ess too much during the mastering stage, Over-De-Essing can cause your track to sound harsh and brittle.
- When De-Essing In the mix, never use defaults. This will prevent you to focus on the audible issues that this tool can cause. You always have to tweak the settings.
What Frequency Should I Set De-Esser?
De-Esser has default settings that can be used to record most songs or speech recordings. The default setting is 5506Hz. This frequency attenuates to about 3-kHz with most of the attenuations occurring at the rate of 5kHz. SideChain Filters can be used in a standard way for a high pass for general de-ingesting.
How do you EQ De-Esser?
When sensitivity occurs, vocal sound are reduced to an acceptable level. Many engineers make this automatic by editing vocals on separate tracks.
Where do you put De-Esser?
It can be placed on a channel strip or inserted into an effect return track for mixing and mastering. Check your DAW it may include already a de esser plugin.
How do you audition with De-Esser?
This is a very powerful tool that can be used with just about any vocal sound track. As with many effects, it’s important to find the sweet spot of where you’re applying it in order to create your desired effect without introducing artifacts or making things sound too harsh.
Top 5 Tips to Reduce Sibilance in Your Microphones
Here are the top 5 tips to reduce sibilance in your microphones:
- Choose a microphone with a more robust sound.
- Keep your distance from the microphone.
- Tilt the microphone slightly off-axis.
- Place your finger against your mouth or a pencil.
- Use a De-Esser & EQ to correct the problem. Play with the different EQ parameters. Many EQs are great to show sibilant frequencies.

If you miss audio examples to start practicing what you learned today, use search to find examples, many vendors offer male or female vocals audio examples to give you some assignment when you get your feet wet in de-essing vocals.
Conclusion
Having a good De-Esser is essential for working with dialogue. Another excellent product from FabFilter is the Pro-DS, Nectar 3 De-Esser, or RX 9 De-ess (both iZotope) which features a De-Essing feature that transparently reduces sibilance from sources and offers an extensive range of controls to fine-tune even the most difficult ones. FabFilter’s Pro-DS is a versatile tool for limiting high-frequency content, such as drums or even complete mixes, when utilized in the ‘Allround’ mode.
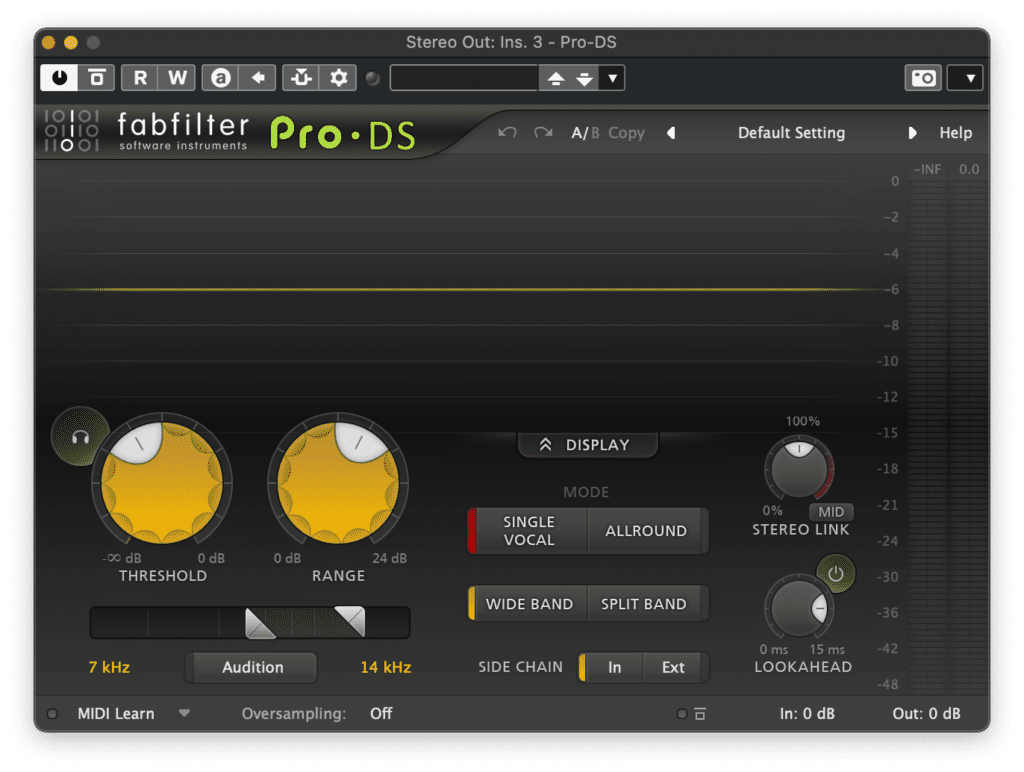
The visual feedback makes it easy to manage the frequency control to keep an eye on the frequency spectrum. If you have a result that sound unnatural or the vocal sound dull you may address the wrong problem frequencies until the vocal chain sound smoother with no harsh frequencies you have to work on the recorded original signal, rinse and repeat is also true in the music industry.
Taming Sibilance Champion
If you are a champion on the vocal bus, try to enhance the whole track by paying attention to the acoustic guitars. At the end you will become the Master in taming sibilance, wide band de essing, and split band de essing.
Using a De-Esser is an essential part of reducing unwanted sibilant sounds in your vocal tracks. In this blog post, we’ve walked you through the basics on how to use your De-Esser right. We’ve also provided some De-Essing tips for recording vocals and De-Essing in the mix. Finally, we’ve talked about frequency settings and where to put your De-Esser. Experiment with different De-Essing techniques to find the one that works best for your track!
Softube
Softube Weiss Series Sale

Softube Weiss Series Sale
The Weiss Series (Affiliate Link) brings transparency to the key areas of mixing & mastering, providing you with world-class analog-emulated compressors, limiters, and de-essing units to enhance your musical creations. Save up to 45% now at Plugin Boutique.

Compressor
All FabFilter Pro plug-ins now available as AUv3 on iPad
Selected FabFilter Pro plug-ins in the AUv3 format for iOS on the iPad. They can be used in any AUv3-compatible host, including GarageBand, Cubasis, AUM, Auria, and n-Track Pro. Apple’s iPad has become a major mobile music production platform in recent years, thanks to more processing power and the advent of the AUv3 plug-in format. Selected key FabFilter Pro plug-ins are available to use in any DAW on the iPad that supports AUv3 plug-ins.
As might be expected, FabFilter has put a lot of effort into refining and tweaking the plug-in interfaces with great touch behavior and support for various interface sizes, including full-screen support in all plug-ins.
Pricing
FabFilter Pro-Q 3, Pro-C 2, Pro-DS, and Pro-G are available individually for $29.99 USD. Pro-L 2, Pro-R, and Pro-MB are available for $39.99 USD. Users can purchase all AUv3 Pro plug-ins for iOS as a Pro Bundle for $129.99 USD. It is possible to purchase one or more AUv3 plug-ins now and upgrade to the AUv3 Pro Bundle later, in which case users will pay just the remaining sum.
FabFilter Pro-Q 3 is available as an AUv3 plug-in for iPad in the App Store. Using Pro-Q 3 on a touch screen is slightly different from using it with a mouse. You need to drag to adjust with your finger, resetting with double-tap. More on using iOS FabFilter is detailed by FabFilter here.
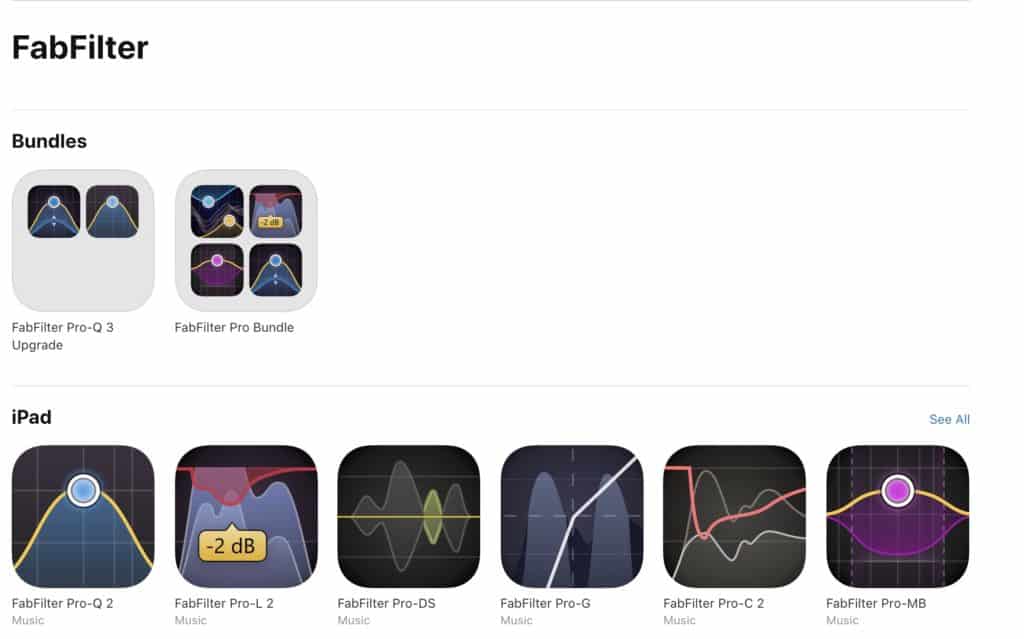
Upgrading to FabFilter Pro-Q 3 (AUv3)
Users who purchased the AUv3 plug-in version of FabFilter Pro-Q 2 for iOS earlier can upgrade to the AUv3 version of Pro-Q 3 by purchasing the Pro-Q 3 Upgrade Bundle. If one already owns Pro-Q 2 AUv3 for iOS, the amount that was paid for it earlier will be deducted from the bundle price, resulting in up to 50% discount for the upgrade.
About FabFilter plug-ins in Auria
Until recently, FabFilter plug-ins were only available on iOS as in-app purchases in Auria. Users of the in-app FabFilter plug-ins in Auria can continue to use these and FabFilter will keep supporting them. New plug-ins, like Pro-Q 3, will only be made available in the AUv3 format so they can be used both in Auria and in other hosts. App Store limitations make it impossible to offer an upgrade path from the plug-ins bought as in-app purchases in Auria to the new AUv3 plug-ins.
Accusonus
Accusonus ERA 4 – Intelligent Audio Cleaning and Repair for Filmmaker
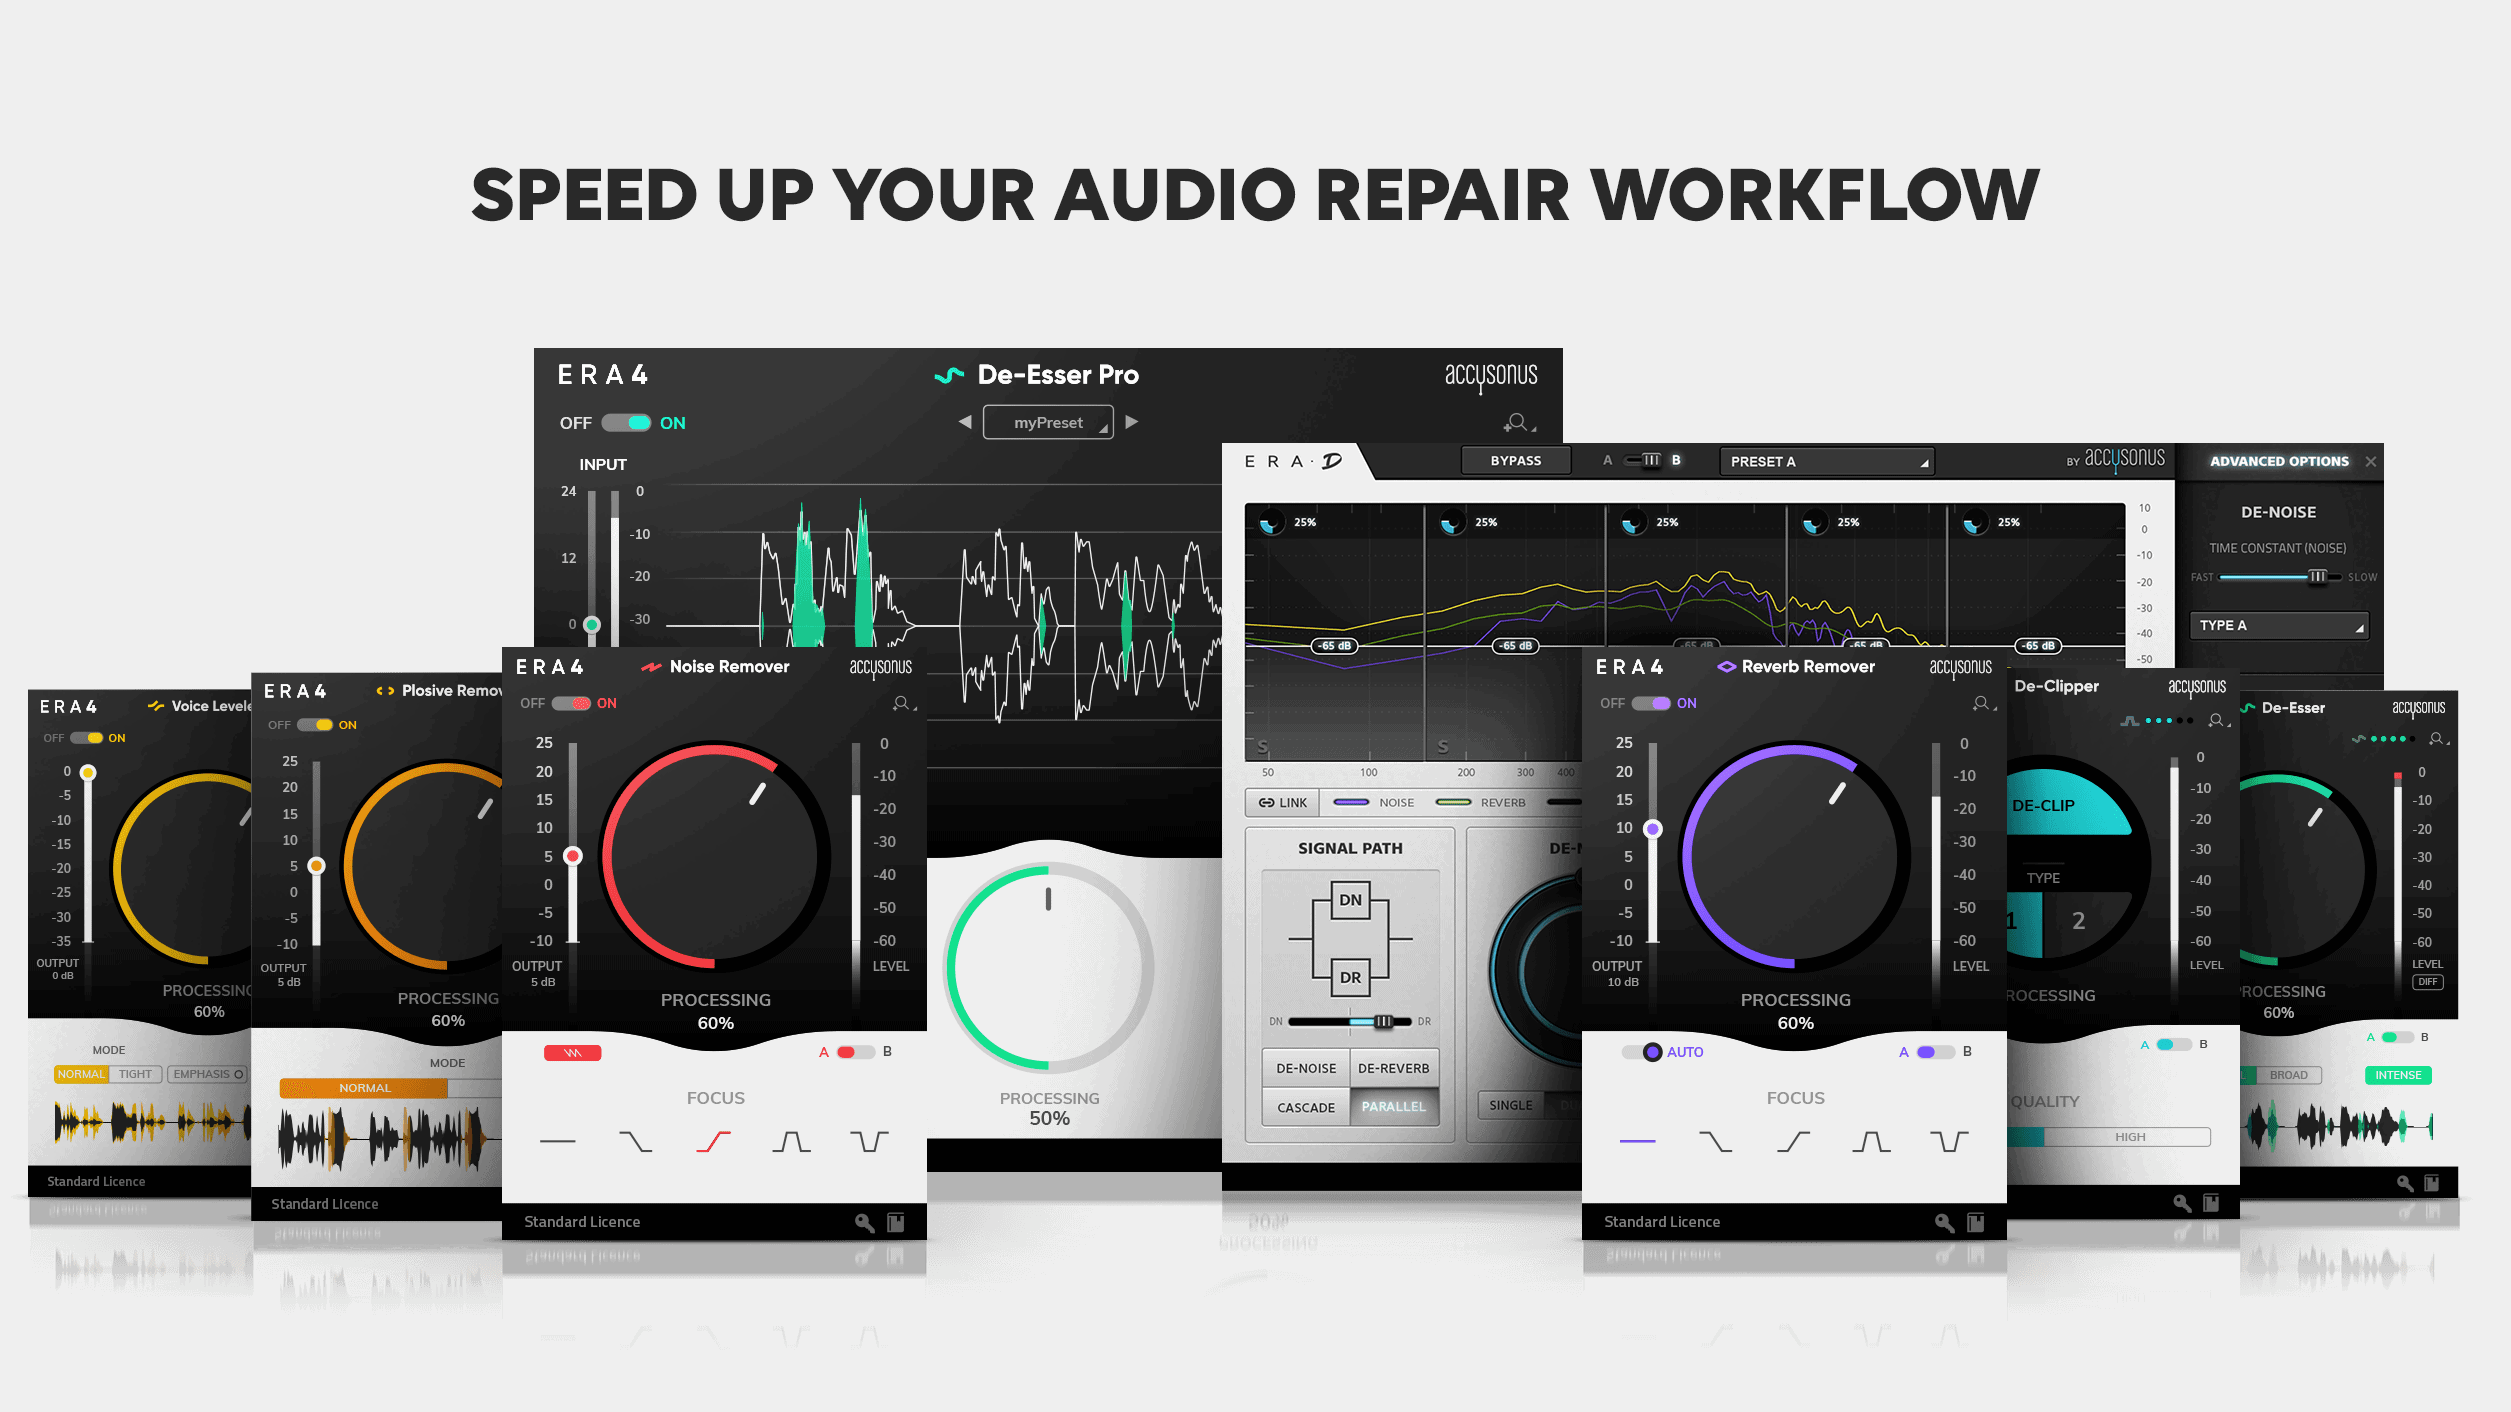
Advanced Sound Processing with Intelligent, Single Knob Audio Repair, and Noise Reduction
Accusonus Brings Advanced Sound Processing to Newest Family of Intelligent, Single Knob Audio Repair and Noise Reduction Plug-ins for Video Editors, Sound Engineers, Podcasters New Accusonus ERA 4 Bundles Simplify, Accelerate Complex Audio Workflows with Single-Knob, Intelligent Control for High-Quality Audio Cleaning and Repair for Content Creators of Any Skill Level and on Any Platform
Accusonus announced it is bringing its multi-patented, single-knob audio cleaning and noise reduction technology to its newest family of plugins for video editors, audio engineers, and podcasters: the ERA 4 Bundles.
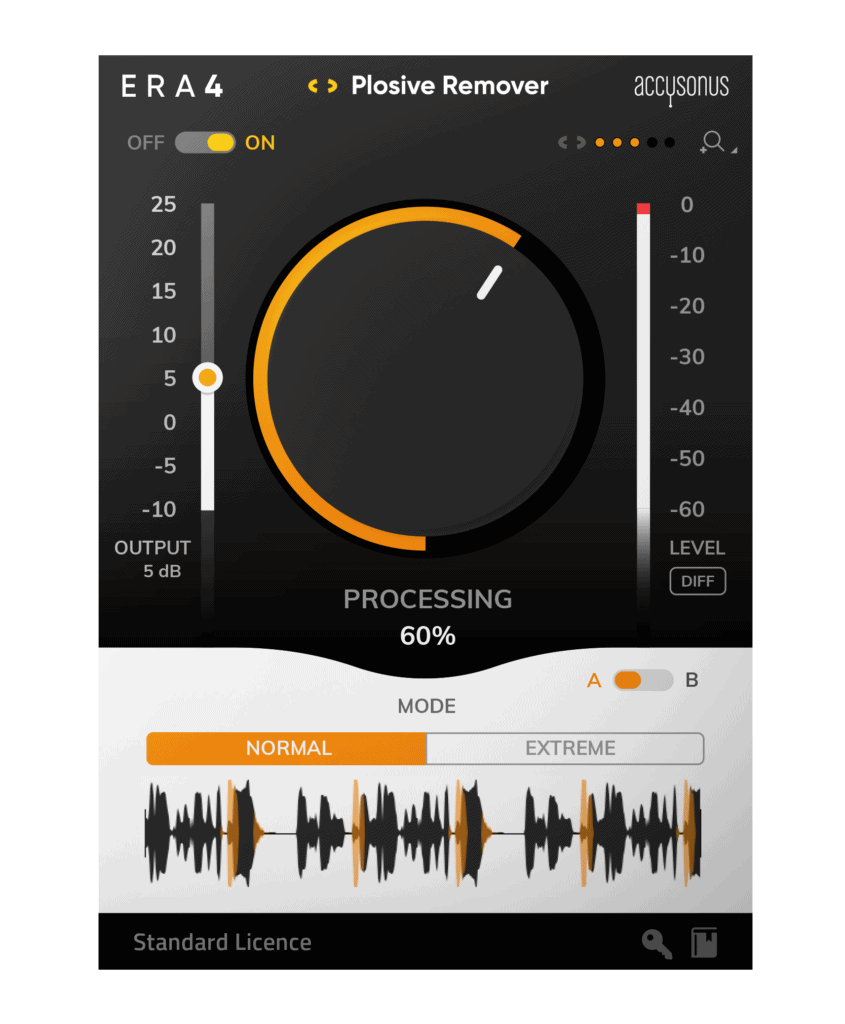
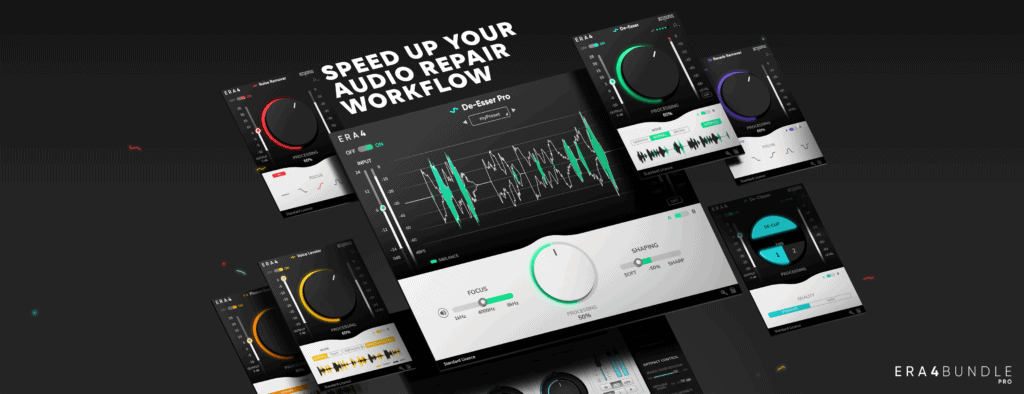
The ERA 4 Bundles (Enhancement and Repair of Audio) are a collection of single knob audio cleaning plug-ins specifically designed to reduce the complexity of the sound design and audio workflow without compromising sound quality or fidelity. They are available today in two collections: The Standard Bundle and the Pro Bundle.
Accusonus’ patented single knob design appeals to professional editors, filmmakers, and podcasters as its advanced design greatly reduce the time-consuming audio repair workflow to a simple twist of a dial. Additionally, the ERA 4 Standard family of plug-ins enables aspiring content creators, YouTubers, and film and audio students to quickly master audio workflows with minimal effort or expertise.
Accusonus, based in Athens, Greece, and with engineering offices in Boston, MA, made its industry debut in 2014 with a family of groundbreaking, critically-acclaimed music software tools. Among the first to integrate machine learning and artificial intelligence technology into audio production software, Accusonus transformed the way musicians and sound designers created music. Today they are leveraging their audio engineering expertise to expand into the film and video, content creation, and burgeoning podcasting markets.
The Accusonus ERA 4 Bundles: What’s Included
The Accusonus ERA 4 Bundles are available in two different collections; the Standard Bundle and the Pro Bundle.
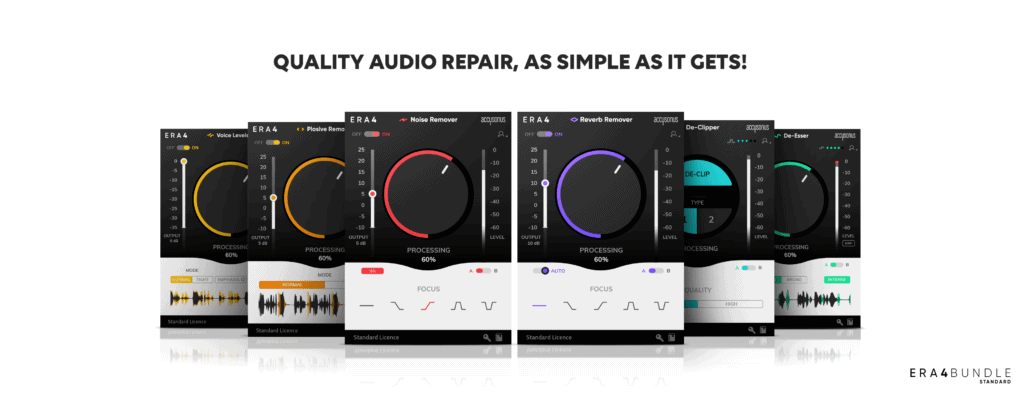
The ERA 4 Standard Bundle
The ERA 4 Standard Bundle is a collection of single knob audio cleaning plug-ins, that are designed for speed and fidelity with minimal effort, even if users have never edited audio before. The ERA Bundle delivers professional sound design, even to beginners. The bundle includes:
- Noise Remover
- Reverb Remover
- De-Esser
- Plosive Remover
- Voice Leveler
- De-Clipper
The ERA 4 Pro Bundle
The ERA Bundle Pro 4 is a multi-patented bundle of audio repair tools that offer both speed, and high-quality, high fidelity processing without compromise. Ideally suited for professional editors audio engineers and podcasters in advanced post and music production environments, Accusonus’ intelligent tools help save significant studio time by automating typically time-consuming workflows and simplifying workflows with single-knob adjustments.
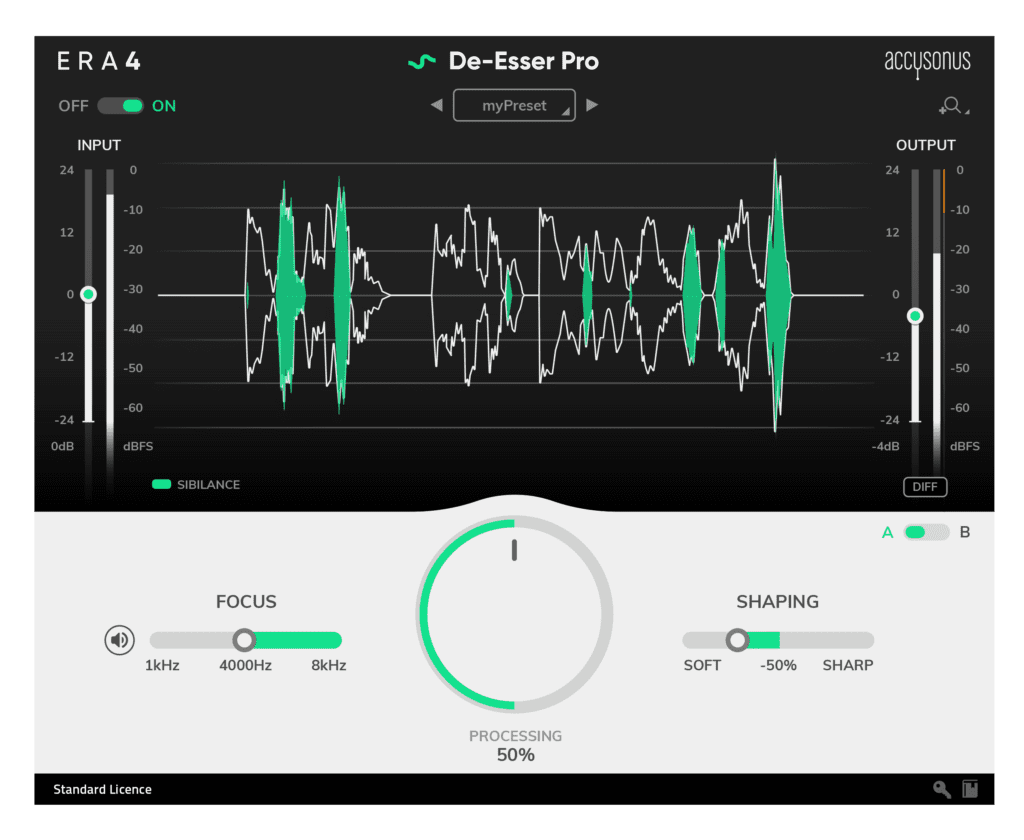
The ERA 4 Pro Bundle includes all of the plug-ins from the Standard Bundle and adds the ERA De-Esser PRO, a sophisticated, yet fast and easy-to-use de-essing plug-in. Except for the large main knob, ERA De-Esser PRO offers some extra controls to give you the granularity you need to really dive in and fine-tune the settings for when you’re fixing up a really bad recording.
For filmmakers, video editors and YouTube Creators, the ERA Bundle is also supported in the following video editing applications:
- Adobe Premiere CC 2017 (or higher)
- Apple Final Cut Pro X 10.4 (or higher)
- BlackMagic Design DaVinci Resolve 14 (or higher)
- Avid Media Composer 2018.12
- MAGIX Vegas Pro 15 (or higher)
The Accusonus ERA Bundle is fully supported by the following audio editors / DAW’s
- Avid Pro Tools 12.6 (or higher)
- Audacity 2.2.2
- Apple Logic Pro 10.4.3 (or higher)
- Ableton Live 9 (or higher)
- Cockos Reaper v5.9
- Image Line FL Studio 12
- Presonus Studio One 3 (or higher)
- Steinberg Cubase 8 (or higher)
- Adobe Audition CC 2017 (or higher)
- Apple GarageBand 10.3.2
Pricing and Availability
The Accusonus ERA 4 Bundles are available immediately and are priced as follows:
The ERA 4 Standard Bundle: $149.00 USD | Special Introductory Price (until July 31, 2019): $119
The ERA 4 Pro Bundle: $499 USD | Special Introductory Price (until July 31, 2019): $349
-
 Microphone2 weeks ago
Unleash Your Inner Podcaster: Discover the Best Microphone for Crisp, Clear Audio
-

 Music Theory2 weeks ago
Unlocking Nature’s Harmony: The Power of 432 Hz Frequency in Sound & Music for Enhanced Living and Well-Being
-

 Sound Design3 weeks ago
What Is the Difference Between a Sound Engineer and A Sound Designer?
-

 Native Instruments Kontakt2 weeks ago
VOCAL AI – Animated Intelligence: The Ultimate Vocal Playground
-
 Sound Design3 weeks ago
Why Sound Engineer
-

 Composing2 weeks ago
MUTILATED NOISE by SampleTraxx: The Next Generation Sound Collection
-

 Expert Guides3 weeks ago
How Do You Become a Sound Designer
-

 Expert Guides3 weeks ago
How to Become a Sound Designer for Film


